A STEP BY STEP GUIDE ON HOW TO DESIGN YOUR MERCH
A full step by step guide on how to design your merchandise on the Hawkr website is coming soon.
Here is a quick guide to the basics :
Looking for artwork specs? Click here
CREATE YOUR FIRST PIECE OF MERCH
WATCH DEMO VIDEO
step by step instructions below


HOW TO USE THE PRODUCT EDITOR
Getting started:
1. First log in to your artist account, to visit the log in page click here
(Don't have an account yet? You can register by clicking here)
2. Once logged in, from the black menu bar on the lefthand side of the screen, click on 'PRODUCTS'
3. Then on the righthand side, click the black 'ADD' button.
Please note, you can only edit designs on a desktop computer (ie not a phone)

Designing your product
Next, there are three tabs to fill out for each item of merch. Firstly you fill out the details of the garment you want to create, then you add your artwork in our editor to create the design. Lastly, you will have the opportunity to add extra imagery.
Once your item is created, it can be live in your merch stand and fans can view and purchase it.
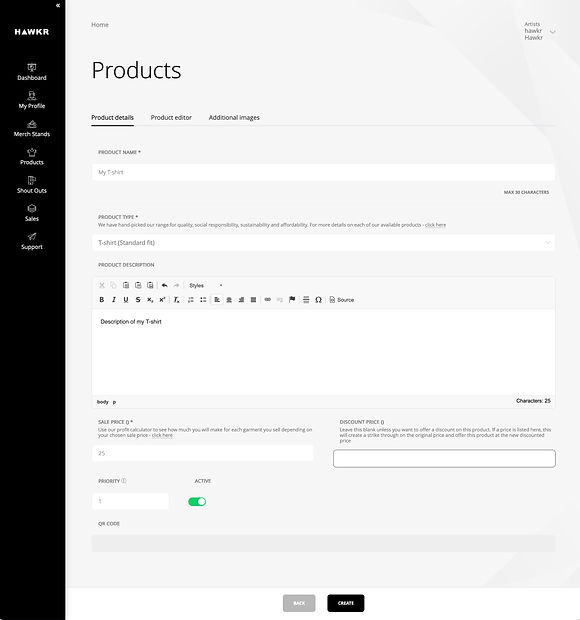
Tab1: Product Details
1. Choose a name for the product you are designing. This is the name fans will see on the app. i.e 'Awesome European Tour T-shirt'.
2. Pick the category of the product you want to design from the dropdown i.e a hoodie or t-shirt. To read more about each garment click here
3. Write a description in the summary box of the product to help fans when they are browsing your products.
4. Choose a price that you want to sell your product at. This is what a fan will pay. To see how much money you will make from your chosen sale price, use our artist calculator click here
5. At any time, you can select to discount your product. Leave this blank until you want to offer a discount or sale price. If a price is listed here, this will create a strike through on the original price and offer the product at a new discounted price. This can be edited at any point.
6. When this section is complete, click the 'CREATE' button. Once the product has been created you can move on to the next 'PRODUCT EDITOR' tab, instructions below.
Tab 2: Product Editor
1. Choose the colour of your garment.
As your using Hawkr with no upfront costs, create a range for fans to choose from in as many colours as you like
2. Upload your design or logo using the ‘UPLOAD’ button - for artwork specifications click here
3. Position your design where you want it to be on the real garment. You can add an image to the front and back. Each print has a cost, so single sided print will be more profitable, double sided print adds around £4 to the cost of production (see artist calculator for details)
4. Use the preview button to see how the front and back look together.
5. Once happy with your design, click ‘PUBLISH’ to upload the artwork, this may take up to a few minutes to upload. If you make further changes, you will need to click ‘PUBLISH’ again.
6. When you have finished, click ‘SAVE’ at the bottom of the page. You can then exit using the back button or side menu. This item will now be ready in your merch stand.

Tab 3: Additional Images (this step is optional)
1. Use this tab to add more images that sell your item. Additional images such as close-ups of the design or photos of someone wearing the samples go a long way.
The editor will automatically create mock-up images for your merch stand but this is you opportunity to add more.
(to learn how to order sample display merch click here)

NEED HELP?
If you need help creating your products, please contact us at support@hawkrlive.com